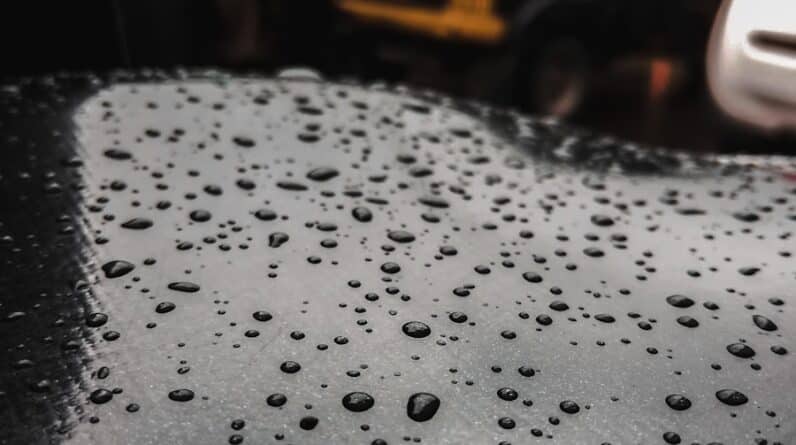
Color sanding and buffing is a meticulous process used to enhance the finish of a vehicle’s paint job. This technique involves sanding the surface of the paint to remove imperfections, such as orange peel, dust nibs, or scratches, and then buffing it to restore a high-gloss shine. Essentially, you are refining the paint surface to achieve a smooth and flawless appearance.
The process is often employed after a fresh paint job or when restoring an older vehicle’s finish, allowing you to bring out the best in your car’s aesthetics. When you engage in color sanding and buffing, you are not just improving the visual appeal of your vehicle; you are also protecting its value. A well-maintained paint job can significantly enhance the resale value of your car.
By understanding the intricacies of this process, you can take pride in your vehicle’s appearance and ensure it stands out on the road. Whether you’re a car enthusiast or simply want to maintain your vehicle’s beauty, mastering color sanding and buffing is an invaluable skill.
- Color sanding and buffing is a process used to remove imperfections in the clear coat of a car’s paint job, resulting in a smooth and glossy finish.
- The benefits of color sanding and buffing include removing orange peel texture, eliminating scratches and swirl marks, and enhancing the overall appearance of the car’s paint.
- Tools and materials needed for color sanding and buffing include sandpaper, a sanding block, a dual-action sander, rubbing compound, polishing compound, and a buffer.
- A step-by-step guide to color sanding and buffing involves washing and drying the car, sanding the surface with progressively finer grit sandpaper, and then buffing the paint to a high gloss.
- Common mistakes to avoid when color sanding and buffing include using too much pressure, not using enough water, and skipping the polishing step.
The Benefits of Color Sanding and Buffing
The benefits of color sanding and buffing extend beyond mere aesthetics. One of the most significant advantages is the ability to eliminate surface imperfections that can detract from your car’s overall look. By removing these flaws, you not only enhance the visual appeal but also create a smoother surface that reflects light more effectively.
This results in a deeper, more vibrant color that can make your vehicle look brand new. Additionally, color sanding and buffing can help protect your car’s paint from environmental damage. Over time, exposure to UV rays, dirt, and other contaminants can dull the finish of your vehicle.
By regularly engaging in this process, you can maintain a protective layer that keeps your paint looking fresh and vibrant. Furthermore, this technique can help prevent rust and corrosion by ensuring that the paint adheres properly to the metal surface beneath. In essence, color sanding and buffing is not just about aesthetics; it’s also about preserving the integrity of your vehicle.
Tools and Materials Needed for Color Sanding and Buffing

Before you embark on your color sanding and buffing journey, it’s essential to gather the right tools and materials. You will need a variety of sandpaper grits, typically ranging from 1000 to 3000 grit, to effectively smooth out imperfections without damaging the paint. A sanding block or a dual-action sander can help you achieve an even finish while minimizing the risk of creating new scratches.
In addition to sandpaper, you’ll require a high-quality buffing compound and a buffer or polisher. A rotary buffer is often preferred for its power, but a dual-action polisher can be easier to control for beginners. Don’t forget to have microfiber towels on hand for cleaning and polishing, as they are gentle on the paint and help prevent swirl marks.
Lastly, safety gear such as gloves and goggles is crucial to protect yourself from dust and debris during the sanding process.
Step-by-Step Guide to Color Sanding and Buffing
To begin color sanding and buffing, start by thoroughly washing your vehicle to remove any dirt or contaminants that could scratch the paint during the process. Once clean, dry the surface completely before inspecting it for imperfections. Identify areas that require attention, such as scratches or uneven spots.
Next, select your sandpaper grit based on the severity of the imperfections. For deeper scratches, start with a lower grit (around 1000) and gradually work your way up to finer grits (up to 3000) for a smooth finish. Wet sanding is often recommended as it helps reduce dust and keeps the sandpaper from clogging.
Use a sanding block or dual-action sander to apply even pressure while sanding in a circular motion. Be cautious not to sand too aggressively, as this can damage the paint. After achieving a smooth surface, it’s time to buff the paint.
Apply a small amount of buffing compound to your buffer pad and work it into the paint using slow, controlled movements. Start with a lower speed setting to avoid burning the paint, gradually increasing as needed. Buff until you achieve a glossy finish, then wipe away any excess compound with a microfiber towel.
Repeat this process until you are satisfied with the results.
Common Mistakes to Avoid When Color Sanding and Buffing
While color sanding and buffing can yield stunning results, there are several common mistakes that you should be aware of to avoid damaging your vehicle’s finish. One of the most significant errors is using too coarse of sandpaper too early in the process. Starting with a grit that is too low can lead to deep scratches that are difficult to remove later on.
Always assess the severity of imperfections before selecting your sandpaper grit. Another mistake is neglecting to keep the surface wet during wet sanding. Failing to do so can cause the sandpaper to clog quickly and may lead to uneven sanding marks on your paint.
Additionally, rushing through the buffing process can result in swirl marks or an uneven shine. Take your time and ensure that you are applying consistent pressure while buffing for optimal results.
Tips for Achieving a Professional Finish with Color Sanding and Buffing

To achieve a professional finish when color sanding and buffing, attention to detail is key. Start by ensuring that your workspace is clean and free from dust or debris that could settle on your freshly sanded surface. Consider working in a shaded area or indoors to prevent direct sunlight from affecting the curing process of your buffing compound.
When sanding, use light pressure and let the sandpaper do the work rather than forcing it down onto the surface. This approach will help you avoid creating new scratches while ensuring an even finish. After sanding, take time to inspect your work closely; if you notice any remaining imperfections, don’t hesitate to go back with finer grit sandpaper.
During the buffing stage, use overlapping passes with your buffer to ensure even coverage across the entire surface area. It’s also beneficial to change out your buffing pads regularly as they can become worn out over time, which may affect their performance. Finally, after achieving your desired shine, consider applying a wax or sealant for added protection against environmental elements.
How Often Should You Color Sand and Buff Your Car?
The frequency with which you should color sand and buff your car largely depends on how often you drive it and the conditions it is exposed to. If you frequently park outdoors or live in an area with harsh weather conditions, you may find that your vehicle requires more regular attention than one that is kept in a garage or under cover. As a general guideline, consider performing color sanding and buffing every six months to a year for optimal maintenance.
However, if you notice visible imperfections or dullness in your paint finish sooner than that, don’t hesitate to address them promptly. Regular inspections will help you determine when it’s time for this rejuvenating process.
When it comes to color sanding and buffing, you may find yourself weighing the pros and cons of hiring a professional versus tackling the task yourself. Hiring a professional can save you time and ensure that the job is done correctly with minimal risk of damaging your vehicle’s finish. Professionals have experience with various paint types and know how to handle different imperfections effectively.
On the other hand, taking on this project yourself can be rewarding both financially and personally. You’ll gain valuable skills while also saving money on labor costs. However, if you’re inexperienced or unsure about the process, there’s a risk of making mistakes that could lead to costly repairs down the line.
Ultimately, whether you choose to hire a professional or go the DIY route depends on your comfort level with automotive care and your willingness to invest time into learning this skill. Whichever path you choose, understanding color sanding and buffing will empower you to maintain your vehicle’s appearance effectively.
If you’re interested in learning more about innovative technologies in the auto body repair industry, check out this article on Augmented Reality Assistance Revolutionizing Repairs Through Hands-Free Diagnostics and Remote Support. This article explores how augmented reality is transforming the way repairs are done by providing hands-free diagnostics and remote support. It’s a fascinating look at how technology is changing the game in the auto body repair world.
FAQs
What is color sanding and buffing for cars?
Color sanding and buffing is a process used to remove imperfections and smooth out the surface of a car’s paint job. It involves sanding the surface with fine grit sandpaper to remove orange peel, runs, and other imperfections, and then buffing the surface to a high gloss finish.
Why is color sanding and buffing necessary for cars?
Color sanding and buffing is necessary to achieve a smooth and flawless finish on a car’s paint job. It helps to remove imperfections and blemishes, and can also restore the shine and luster of the paint.
Can color sanding and buffing be done at home?
Color sanding and buffing can be done at home, but it requires skill, patience, and the right tools and materials. It is often best left to professionals who have experience in this process to ensure the best results.
What tools and materials are needed for color sanding and buffing?
The tools and materials needed for color sanding and buffing include fine grit sandpaper, a sanding block, a dual action sander or polisher, rubbing compound, polishing compound, and microfiber towels.
How long does color sanding and buffing take?
The time it takes to color sand and buff a car can vary depending on the size of the vehicle and the extent of the imperfections. It can take anywhere from a few hours to a full day to complete the process.