When you embark on the journey of auto body sanding, it’s essential to grasp the fundamental principles that govern this craft. Sanding is not merely about smoothing out surfaces; it’s a critical step in the process of restoring your vehicle’s appearance and integrity. The primary goal of sanding is to create a surface that is ready for painting or refinishing.
This involves removing old paint, rust, and imperfections while ensuring that the underlying metal or plastic is not damaged in the process. Understanding the grit levels of sandpaper is crucial, as they dictate how aggressive or gentle your sanding will be. Coarse grits are ideal for heavy material removal, while finer grits are used for finishing touches.
As you delve deeper into auto body sanding, you’ll discover that technique plays a significant role in achieving a flawless finish. It’s not just about applying pressure and moving the sandpaper back and forth; it requires a delicate balance of technique and patience. You need to be mindful of the surface you’re working on, adjusting your approach based on whether you’re dealing with a flat panel or a contoured area.
The goal is to create an even surface that will allow for optimal adhesion of paint or primer, ultimately enhancing the overall aesthetic of your vehicle.
- Auto body sanding is a crucial step in the refinishing process to remove imperfections and create a smooth surface for painting.
- Choosing the right sanding tools and materials, such as sandpaper grit and sanding blocks, is essential for achieving the desired finish.
- Properly preparing the surface for sanding, including cleaning and masking, is important to ensure a successful refinishing job.
- Different types of damage, such as scratches, dents, and rust, require specific sanding techniques to effectively repair and refinish the auto body.
- Applying primer and filler after sanding helps to create a smooth surface for painting and ensures a professional-looking finish.
Choosing the Right Sanding Tools and Materials
Selecting the appropriate sanding tools and materials is pivotal to your success in auto body sanding. The market offers a plethora of options, from hand sanders to electric sanders, each designed for specific tasks. Hand sanding can provide you with greater control, especially in tight spaces or intricate designs, while power sanders can expedite the process for larger areas.
When choosing between these tools, consider the size of the area you’re working on and your comfort level with each tool. A dual-action sander, for instance, can be an excellent choice for beginners due to its versatility and ease of use. In addition to tools, the type of sandpaper you select will significantly impact your results.
Sandpaper comes in various grits, typically ranging from 40 to 2000. For initial sanding, coarser grits like 80 or 120 are effective for removing old paint and imperfections. As you progress, transitioning to finer grits such as 400 or 600 will help smooth out the surface and prepare it for painting.
It’s also wise to invest in high-quality sandpaper that resists clogging and tearing, ensuring a more efficient sanding process. By carefully selecting your tools and materials, you set yourself up for a successful refinishing project.
Preparing the Surface for Sanding and Refinishing

Before you begin sanding, proper surface preparation is crucial to achieving a professional finish. Start by thoroughly cleaning the area you plan to work on. Remove any dirt, grease, or wax using a suitable automotive cleaner.
This step is vital because contaminants can interfere with the adhesion of paint or primer, leading to unsightly imperfections down the line. Once cleaned, inspect the surface for any rust or damage that may require additional attention before sanding begins. After cleaning, it’s essential to assess the condition of the paint and bodywork.
If there are areas with significant rust or dents, these should be addressed prior to sanding. You may need to use a rust converter or filler to treat these issues effectively. Once you’ve dealt with any major imperfections, you can begin sanding.
Remember to work in sections, focusing on one area at a time to ensure thoroughness and prevent overlooking any spots that need attention. This methodical approach will help you achieve a smooth and even surface ready for refinishing.
Sanding Techniques for Different Types of Damage
Different types of damage require tailored sanding techniques to ensure effective restoration. For instance, if you’re dealing with scratches or minor dents, a light touch with fine-grit sandpaper may suffice. Start by gently sanding around the damaged area to blend it with the surrounding surface.
This technique helps minimize the visibility of imperfections without compromising the integrity of the underlying material. Conversely, if you’re faced with more severe damage such as deep scratches or rust spots, a more aggressive approach is necessary. Begin with a coarser grit sandpaper to remove the damaged material effectively.
As you work through the layers, gradually transition to finer grits to smooth out the surface. It’s important to keep an eye on your progress and avoid over-sanding, which can lead to uneven surfaces or damage to the underlying metal. By adapting your sanding technique based on the type of damage, you can achieve optimal results while preserving the quality of your vehicle’s bodywork.
Applying Primer and Filler for a Smooth Finish
Once you’ve completed the sanding process, applying primer and filler is essential for achieving a smooth finish on your vehicle. Primer serves as a bonding agent between the bare metal and the paint, ensuring better adhesion and durability. Before applying primer, ensure that the surface is clean and free from dust or debris.
A light sanding with fine-grit paper can also help create a better surface for primer application. When it comes to filler, it’s crucial to choose a product that suits your specific needs. For small dents or scratches, a lightweight body filler can be effective in leveling out imperfections.
Apply the filler using a putty knife, ensuring it fills the damaged area completely without excess buildup. Once dry, sand it down using fine-grit sandpaper until it’s flush with the surrounding surface. After this step, apply a coat of primer over the entire area to seal it and prepare it for painting.
This meticulous approach will ensure that your refinishing project has a solid foundation for achieving a professional-looking finish.
Achieving a Glossy Surface with Proper Buffing and Polishing

After painting your vehicle, achieving a glossy surface requires careful buffing and polishing techniques. Buffing is essential for removing any imperfections in the paint and enhancing its shine. Start by allowing the paint to cure fully according to manufacturer instructions before beginning this process.
Once cured, use a dual-action polisher equipped with a foam pad designed for polishing. Begin buffing at low speeds to avoid burning through the paint layer. Work in small sections, applying a polishing compound that suits your paint type.
As you buff, keep an eye on your progress; you want to achieve a high gloss without compromising the integrity of your paint job. After buffing each section, wipe away any residue with a clean microfiber cloth before moving on to the next area. Once buffing is complete, consider following up with a high-quality wax or sealant to protect your newly polished surface.
This step not only enhances shine but also provides an additional layer of protection against environmental elements such as UV rays and moisture. By investing time in proper buffing and polishing techniques, you can achieve a stunning glossy finish that will make your vehicle stand out.
Troubleshooting Common Issues in Auto Body Sanding and Refinishing
Even with careful planning and execution, issues can arise during auto body sanding and refinishing projects. One common problem is uneven surfaces after sanding; this can occur if too much pressure is applied or if you fail to change grits appropriately during the process. If you notice unevenness, take a step back and assess your work.
You may need to go back with finer grit sandpaper to smooth out any rough patches before proceeding further. Another issue that often arises is paint adhesion problems, which can manifest as peeling or flaking paint after application. This typically occurs when surfaces are not adequately prepared before painting or when incompatible products are used together.
To troubleshoot this issue, ensure that all surfaces are clean and properly primed before applying paint. If peeling occurs after painting, it may be necessary to strip back layers and start over with proper preparation techniques.
Tips for Maintaining a Smooth and Glossy Surface
Once you’ve achieved that perfect finish on your vehicle, maintaining it becomes paramount to preserving its appearance over time. Regular washing is essential; however, it’s important to use gentle cleaning products specifically designed for automotive finishes to avoid damaging the clear coat or paint layers. Avoid automatic car washes that use harsh brushes; instead opt for hand washing with microfiber cloths that are less likely to scratch your vehicle’s surface.
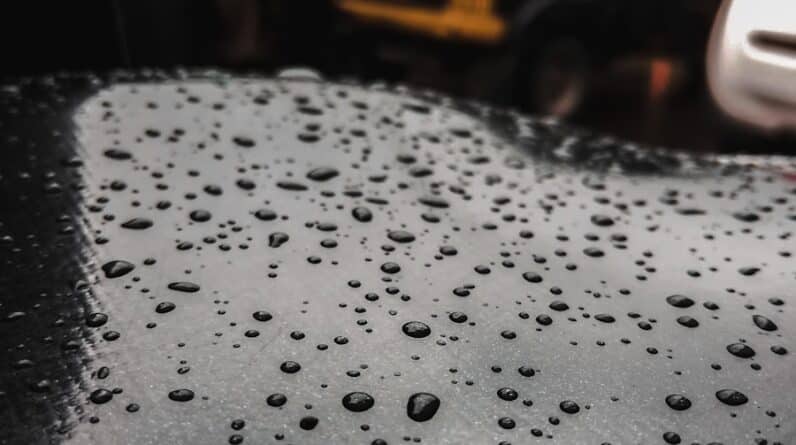
In addition to regular washing, consider applying wax every few months as an added layer of protection against environmental elements such as UV rays and road grime. Wax not only enhances shine but also helps repel water and dirt buildup on your vehicle’s surface. Furthermore, parking in shaded areas or using car covers can protect your vehicle from prolonged sun exposure that can fade paint over time.
By following these maintenance tips diligently, you’ll ensure that your vehicle retains its smooth and glossy finish for years to come, allowing you to enjoy both its aesthetic appeal and value long into the future.
If you are interested in learning more about enhancing the customer experience in auto body repair, you may want to check out this article on the role of transparency, communication, and CRM systems in car repair. This article delves into how these factors can improve the overall experience for customers seeking auto body repair services.
FAQs
What is auto body sanding and refinishing?
Auto body sanding and refinishing is the process of smoothing out imperfections in a vehicle’s paint and achieving a glossy, professional finish. This process involves sanding the surface of the vehicle to remove any blemishes, followed by applying new layers of paint and clear coat to achieve a smooth and glossy surface.
What are the benefits of DIY auto body sanding and refinishing?
DIY auto body sanding and refinishing can save you money on professional auto body work. It also allows you to customize the finish of your vehicle and gives you a sense of accomplishment from completing the project yourself.
What tools and materials are needed for DIY auto body sanding and refinishing?
Some of the tools and materials needed for DIY auto body sanding and refinishing include sandpaper of various grits, a sanding block, a dual-action sander, a spray gun, primer, paint, and clear coat. It’s also important to have safety equipment such as a respirator, gloves, and eye protection.
What are the steps involved in DIY auto body sanding and refinishing?
The steps involved in DIY auto body sanding and refinishing include preparing the surface, sanding the vehicle to remove imperfections, applying primer, painting the vehicle, and applying clear coat. Each step requires careful attention to detail and proper technique to achieve a smooth and glossy finish.
What are some tips for achieving a smooth and glossy surface in DIY auto body sanding and refinishing?
Some tips for achieving a smooth and glossy surface in DIY auto body sanding and refinishing include using the right grit of sandpaper for each stage of sanding, applying thin and even coats of primer, paint, and clear coat, and allowing ample drying time between each coat. It’s also important to work in a clean and well-ventilated area to avoid dust and debris from ruining the finish.