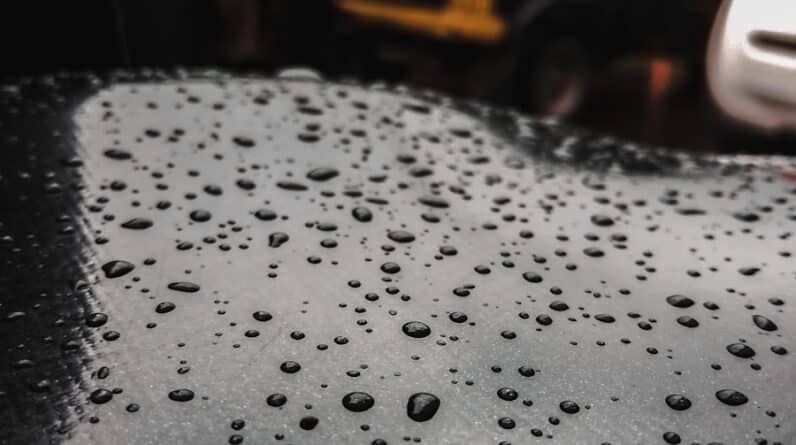
When it comes to automotive finishes, the clear coat is a crucial component that serves both aesthetic and protective functions. You may not realize it, but the clear coat is what gives your vehicle that glossy, polished look while also safeguarding the underlying paint from environmental damage. This transparent layer acts as a shield against UV rays, dirt, and other contaminants that can dull the paint over time.
Understanding the importance of clear coat application is essential for anyone looking to maintain or enhance their vehicle’s appearance. In addition to its protective qualities, the clear coat also plays a significant role in the overall durability of your vehicle’s finish. A well-applied clear coat can help prevent oxidation and fading, ensuring that your car retains its vibrant color for years to come.
As you delve deeper into the world of clear coats, you’ll discover various types and formulations designed for different applications, from automotive finishes to furniture and even art projects. Familiarizing yourself with these options will empower you to make informed decisions about which products best suit your needs.
- Understanding clear coat application is essential for achieving a smooth and glossy finish on your vehicle.
- Properly preparing the surface by cleaning, sanding, and priming is crucial for a successful clear coat application.
- Choosing the right clear coat product based on the type of surface and desired finish is important for achieving the best results.
- When applying clear coat, using proper techniques such as even strokes and maintaining the right distance from the surface is key.
- Drying and curing the clear coat properly is essential for achieving a durable and long-lasting finish.
Preparing the Surface for Clear Coat
Before you even think about applying a clear coat, you must ensure that the surface is impeccably prepared. This step is critical because any imperfections or contaminants on the surface can compromise the adhesion and overall finish of the clear coat. Start by thoroughly washing the area with soap and water to remove dirt and grime.
After washing, it’s advisable to use a clay bar to eliminate any embedded contaminants that washing alone may not remove. This process will leave the surface smooth and ready for the next steps. Once you’ve cleaned the surface, inspect it for any scratches, chips, or imperfections.
If you find any, you’ll need to address these issues before applying the clear coat. Sanding down rough spots and using touch-up paint can help create a flawless base. After sanding, be sure to wipe down the area with a solvent or alcohol to remove any dust or debris created during the sanding process.
This meticulous preparation will ensure that your clear coat adheres properly and results in a smooth, professional-looking finish.
Choosing the Right Clear Coat Product

Selecting the right clear coat product is vital for achieving the desired results. With numerous options available on the market, it can be overwhelming to determine which one is best suited for your project. You should consider factors such as the type of surface you’re working on, the environmental conditions it will be exposed to, and your personal preferences regarding application methods.
For instance, some clear coats are designed specifically for automotive use, while others may be more suitable for woodworking or crafting. In addition to considering the type of surface, you should also evaluate the different formulations available. Some clear coats are solvent-based, while others are water-based.
Solvent-based products tend to offer better durability and resistance to chemicals but may emit stronger fumes during application. On the other hand, water-based clear coats are generally easier to work with and have lower VOC emissions, making them a more environmentally friendly option. By weighing these factors carefully, you can choose a clear coat that aligns with your project requirements and personal values.
Applying Clear Coat: Techniques and Tips
Once you’ve prepared your surface and selected the right product, it’s time to apply the clear coat. The application process can significantly impact the final appearance of your project, so it’s essential to use proper techniques. Start by ensuring that you’re working in a well-ventilated area to avoid inhaling fumes and to promote even drying.
If you’re using spray cans or a spray gun, maintain a consistent distance from the surface—typically around 6 to 12 inches—to achieve an even coat. When applying the clear coat, it’s best to use multiple thin layers rather than one thick layer. This approach helps prevent runs and drips while allowing each layer to dry properly before applying the next.
Be sure to follow the manufacturer’s instructions regarding drying times between coats. Additionally, consider using a light sanding technique between layers to promote adhesion and create an ultra-smooth finish. This step may seem tedious, but it can make a significant difference in the final outcome.
Drying and Curing Clear Coat
After applying your clear coat, understanding the drying and curing process is essential for achieving optimal results. While drying refers to the initial phase where the surface feels dry to the touch, curing is a more extended process where the clear coat hardens and reaches its full durability. Depending on the product you’ve chosen, drying times can vary significantly; some may dry within minutes, while others may take hours or even days to cure fully.
To ensure that your clear coat cures properly, avoid exposing it to moisture or extreme temperatures during this period. It’s advisable to keep your vehicle or project in a controlled environment where temperature and humidity levels are stable. If possible, allow your clear coat to cure undisturbed for at least 24 hours before subjecting it to any stress or cleaning.
This patience will pay off in terms of durability and appearance.
Buffing and Polishing Clear Coat
Once your clear coat has fully cured, you may want to enhance its shine through buffing and polishing. This step can elevate your finish from good to exceptional by removing any minor imperfections or orange peel texture that may have occurred during application. To begin buffing, you’ll need a dual-action polisher or a rotary buffer along with appropriate polishing pads and compounds.
Start with a medium-cut compound to address any imperfections in the clear coat’s surface. Work in small sections and use overlapping passes for even coverage. After you’ve buffed out imperfections, switch to a finer polish to achieve that high-gloss finish you desire.
Remember to keep your buffer moving at all times to avoid burning through the clear coat. Once you’ve completed this process, you’ll be left with a stunning finish that showcases your hard work.
Maintaining Clear Coat Finish
Maintaining your clear coat finish is essential for preserving its appearance and longevity over time. Regular washing is crucial; however, it’s important to use gentle cleaning products that won’t strip away protective layers. Opt for pH-balanced car shampoos and microfiber towels to minimize scratches during washing.
Additionally, consider using a wax or sealant specifically designed for clear coats after washing; this will provide an extra layer of protection against UV rays and contaminants. Another key aspect of maintenance is addressing any minor scratches or blemishes as soon as they occur. Using a touch-up pen or scratch repair kit can help you keep your finish looking pristine without needing extensive repairs.
Regular inspections will allow you to catch issues early on before they become more significant problems that require more intensive work.
Troubleshooting Common Clear Coat Application Issues
Even with careful preparation and application, issues can arise during the clear coat process. One common problem is orange peel texture, which appears as small bumps on the surface of the clear coat. This issue often results from improper spray technique or environmental factors such as humidity or temperature during application.
If you encounter this problem, you may need to sand down the affected area lightly and reapply another layer of clear coat. Another issue you might face is peeling or flaking of the clear coat after it has dried. This can occur if there was inadequate surface preparation or if incompatible products were used during application.
To remedy this situation, you’ll likely need to strip away the affected clear coat entirely and start over with proper surface preparation and compatible products. By understanding these common issues and their solutions, you can approach your clear coat application with confidence and achieve a professional-looking finish every time. Whether you’re working on your vehicle or another project, taking the time to learn about each step in the process will ultimately lead to better results and greater satisfaction with your work.
If you are looking for the best auto body repair services in Hayward, California, then you may want to check out this article on the top auto body repair shops in Hayward. These shops can help you achieve a perfect clear coat application for your vehicle, ensuring a flawless finish. Whether you are in Springfield, Massachusetts, or Bridgeport, Connecticut, the tips and recommendations in this article can help you find the best auto body repair services in your area.
FAQs
What is clear coat application?
Clear coat application is the process of applying a transparent layer of paint over a base coat to protect it and give it a glossy finish. It is commonly used in automotive and furniture finishing.
Why is it important to apply clear coat?
Clear coat provides protection to the underlying paint from UV rays, weathering, and scratches. It also enhances the appearance of the surface by giving it a glossy and smooth finish.
What are the steps for a perfect clear coat application?
The steps for a perfect clear coat application typically include surface preparation, applying the clear coat in thin and even layers, allowing proper drying time between coats, and polishing the clear coat for a smooth finish.
What are some common mistakes to avoid when applying clear coat?
Common mistakes to avoid when applying clear coat include applying too thick of a coat, not allowing proper drying time between coats, and not properly preparing the surface before application.
What are the different types of clear coat application methods?
Clear coat can be applied using spray guns, aerosol cans, or paint brushes. Each method has its own advantages and is chosen based on the specific requirements of the project.
How long does clear coat take to dry and cure?
The drying time for clear coat can vary depending on the type of clear coat and environmental conditions. Generally, it takes 24-48 hours for clear coat to dry and 2-4 weeks to fully cure.