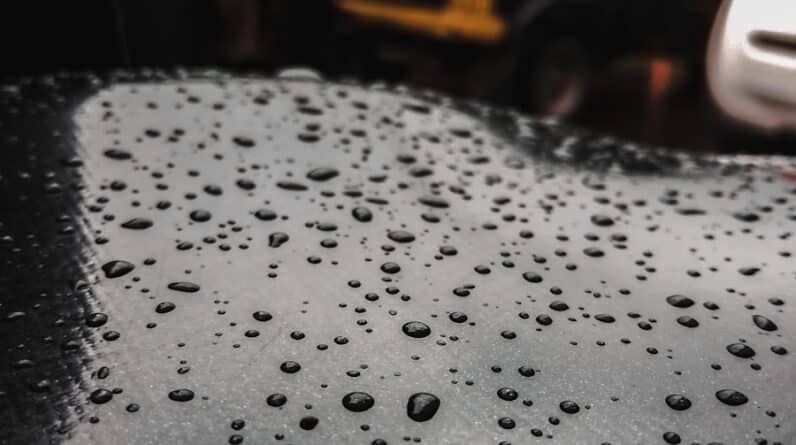
Before embarking on any painting project, it is crucial to assess the condition of your car’s paint. This initial evaluation will help you determine the extent of the work required and whether you can tackle the project yourself or if you need professional assistance. Start by examining the surface for any signs of damage, such as scratches, chips, or rust spots.
Take note of areas where the paint may be fading or peeling, as these imperfections will need to be addressed before applying a fresh coat. As you inspect the paint, consider the overall finish. Is it dull and lifeless, or does it still have some shine?
A thorough assessment will also involve checking for any clear coat damage, which can affect the final appearance of your paint job. If you notice that the paint is oxidized or has lost its luster, you may need to invest time in polishing or buffing before proceeding with any painting. Understanding these factors will guide you in making informed decisions about the materials and techniques you’ll need to use throughout the process.
- Assess the condition of the car’s paint to determine the extent of damage and necessary repairs
- Gather the necessary materials and tools such as sandpaper, filler, primer, and masking tape before starting the painting process
- Prepare the surface for painting by cleaning and removing any dirt, grease, or old paint
- Sand and fill in imperfections on the car’s surface to ensure a smooth and even base for the new paint
- Clean and mask the car to protect areas that should not be painted and ensure a clean application process
- Apply primer and sand the surface to create a suitable base for the new paint to adhere to
- Choose the right paint and application technique based on the desired finish and the type of surface being painted
- Finish with final touches and a thorough inspection to ensure a professional and long-lasting paint job
Gathering the Necessary Materials and Tools
Once you’ve assessed the condition of your car’s paint, it’s time to gather the necessary materials and tools for your project. Having everything on hand before you start will save you time and frustration later on. Begin by compiling a list of essential items, including sandpaper in various grits, primer, automotive paint, clear coat, masking tape, and a spray gun or paintbrush, depending on your preferred application method.
Additionally, consider investing in a paint mixing cup and a respirator mask to ensure safety while working. In addition to these materials, you’ll need some basic tools to facilitate the painting process. A sanding block will help you achieve a smooth surface when sanding down imperfections, while a putty knife can assist in applying filler to deeper scratches or dents.
Don’t forget about cleaning supplies; a degreaser and microfiber cloths will be essential for preparing the surface before painting. By gathering all these materials and tools in advance, you’ll create an efficient workflow that allows you to focus on achieving a professional-looking finish.
Preparing the Surface for Painting

Preparation is key when it comes to painting your car. A well-prepared surface ensures that the paint adheres properly and results in a smooth, even finish. Start by washing your car thoroughly to remove any dirt, grime, or wax that could interfere with the paint application.
Use a gentle automotive soap and rinse thoroughly to ensure no residue remains. After washing, dry the surface completely with a microfiber towel to prevent water spots. Once the car is clean, inspect it again for any remaining imperfections that may have been missed during your initial assessment.
If you find any areas that require attention, now is the time to address them. This may involve sanding down rough spots or applying filler to deeper scratches. After making these repairs, give the surface another wipe-down with a degreaser to ensure it is free from oils or contaminants.
Properly preparing the surface will set the stage for a successful paint job and help you achieve the results you desire.
Sanding and Filling in Imperfections
Sanding is an essential step in preparing your car’s surface for painting. It helps create a smooth base for the new paint to adhere to while also removing any old paint or clear coat that may be flaking off. Begin by using coarse sandpaper (around 80-120 grit) to tackle any significant imperfections such as deep scratches or rust spots.
Be sure to sand in a consistent pattern to avoid creating uneven surfaces. After addressing larger imperfections, switch to finer sandpaper (around 220-320 grit) to smooth out the entire area you’ll be painting. This step is crucial for achieving a professional finish, as it helps eliminate any remaining roughness and prepares the surface for primer application.
If you encounter deeper scratches that cannot be sanded out completely, consider using an automotive filler to fill in these imperfections. Apply the filler according to the manufacturer’s instructions and allow it to cure fully before sanding it down to match the surrounding surface.
Cleaning and Masking the Car
With your car’s surface sanded and imperfections filled, it’s time to clean and mask off areas that you don’t want to paint. Start by giving the entire area another thorough cleaning with a degreaser or wax remover. This step ensures that any dust or debris generated during sanding is removed, providing a clean slate for painting.
Use a microfiber cloth to wipe down all surfaces, paying special attention to edges and crevices where dust may accumulate. Masking is equally important in achieving a clean paint job. Use high-quality masking tape and paper to cover areas such as windows, trim, and tires that should not be painted.
Take your time with this step; proper masking will prevent overspray and ensure sharp lines between painted and unpainted surfaces. If you’re working on larger areas, consider using plastic sheeting to cover sections of the car that are not being painted. A well-masked vehicle will not only look more professional but also save you time during cleanup.
Applying Primer and Sanding

Once your car is clean and masked off, it’s time to apply primer. Primer serves as a bonding agent between the surface and the paint, ensuring better adhesion and durability of the final coat. Choose an automotive primer suitable for your specific type of paint and follow the manufacturer’s instructions for application.
Using a spray gun or aerosol can, apply an even coat of primer over the prepared surface, ensuring complete coverage without drips or runs. After allowing the primer to dry according to the recommended time frame, it’s essential to sand it lightly with fine-grit sandpaper (around 400-600 grit). This step helps smooth out any imperfections in the primer layer and creates a better surface for paint adhesion.
Be gentle during this process; you want to scuff up the primer without sanding through it entirely. Once you’ve completed this step, wipe down the surface with a clean microfiber cloth to remove any dust before moving on to painting.
Choosing the Right Paint and Application Technique
Selecting the right paint for your car is crucial for achieving a long-lasting finish that looks great. Automotive paints come in various types, including acrylic enamel, urethane, and water-based options. Each type has its own characteristics regarding durability, ease of application, and drying times.
Consider factors such as your budget, desired finish quality, and whether you’re looking for a DIY project or something more professional when making your choice. When it comes to application techniques, you have several options at your disposal. Spray guns provide an even application and are ideal for larger areas but require some practice to master.
Alternatively, aerosol cans can be more user-friendly for smaller touch-up jobs but may not deliver as smooth a finish as a spray gun. Whichever method you choose, ensure that you’re working in a well-ventilated area and wearing appropriate safety gear such as gloves and goggles.
Finishing Touches and Final Inspection
After applying your chosen paint color and allowing it to dry completely, it’s time for the finishing touches. Start by applying a clear coat over your painted surface; this layer adds depth and protection against UV rays and environmental damage. Follow the manufacturer’s instructions regarding drying times between coats if you’re applying multiple layers of clear coat.
Once everything has dried thoroughly, conduct a final inspection of your work. Look for any imperfections such as runs or uneven spots that may need touch-ups. If necessary, lightly sand these areas with fine-grit sandpaper before applying additional paint or clear coat as needed.
Finally, remove all masking tape and paper carefully to reveal clean lines around your newly painted areas. With patience and attention to detail throughout this process, you’ll be rewarded with a refreshed vehicle that looks as good as new!
If you are looking to prep your car for a fresh coat of paint, you may also be interested in reading about the best auto body repair shops in Lincoln, Nebraska. These shops can help you with any repairs or touch-ups needed before painting your car. Check out this article for more information on where to find quality auto body repair services in Lincoln.
FAQs
What is the purpose of prepping a car for paint?
Prepping a car for paint is essential to ensure a smooth and professional finish. It involves removing old paint, repairing any damage, and creating a clean surface for the new paint to adhere to.
What are the steps involved in prepping a car for paint?
The steps involved in prepping a car for paint include washing and drying the car, sanding the old paint, repairing any dents or scratches, applying primer, and finally, sanding the primer to create a smooth surface for the new paint.
Why is it important to sand the old paint before repainting a car?
Sanding the old paint helps to create a rough surface for the new paint to adhere to. It also removes any imperfections and creates a smooth base for the new paint.
What type of primer should be used when prepping a car for paint?
It is important to use a high-quality automotive primer that is compatible with the type of paint being used. The primer should also provide good adhesion and corrosion resistance.
Can prepping a car for paint be done as a DIY project?
Yes, prepping a car for paint can be done as a DIY project, but it requires careful attention to detail and the use of proper tools and materials. It is important to follow the correct steps and take the time to ensure a professional finish.